









Looking to create colorful, detailed UV DTF transfers for glassware, tumblers, phone cases, or branded gifts?
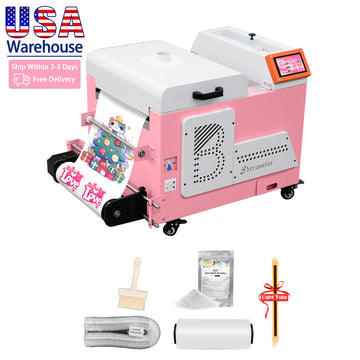
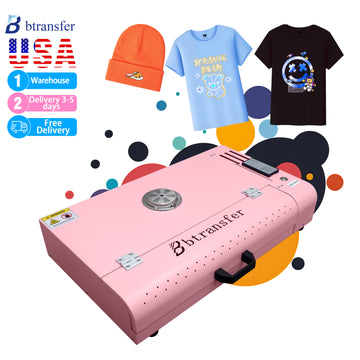
The Bbtransfer MU1730 UV DTF Printer is worth a look. It helps you create custom designs for a variety of hard-surface products, opening up more possibilities for your personalization business. But a great-looking print is only the first step. Even with the right printer, transfers can still have trouble sticking if the surface, film, or application technique isn't quite right.
You apply your UV DTF transfer, peel away the transfer film (B film), and notice that the design isn't sticking properly. Maybe the edges start lifting, or the entire design comes off.

Sound familiar? Don't worry. Poor adhesion is one of the most common problems in UV DTF printing, and it's often easier to fix than you might think.
In this guide, we'll walk through the most common reasons why UV DTF transfers won't stick and share some practical tips to help you get better results.
1. The Surface Isn't Clean Enough
One of the biggest reasons UV DTF transfers fail to stick is a dirty surface.
Even if your product looks clean, it may still have fingerprints, dust, oil, or other invisible residues. These can prevent the adhesive from making proper contact with the surface.
How to fix it:
Before applying your transfer, clean the surface thoroughly.
Use a lint-free cloth to remove dust and dirt.
For compatible surfaces, use isopropyl alcohol to remove fingerprints and grease.
Allow the surface to dry completely before applying the transfer.
Avoid touching the cleaned area with your fingers.
A clean, dry surface gives your UV DTF transfer a much better chance of sticking properly.
2. You're Applying Transfers to the Wrong Material
UV DTF transfers work best on smooth, hard, non-porous surfaces, such as glass, metal, acrylic, and certain plastics.
However, not every material provides the same level of adhesion.
Rough, porous, textured, or low-surface-energy materials can make it difficult for the adhesive to form a strong bond. Some plastics, such as untreated polypropylene (PP) and polyethylene (PE), are especially challenging.
How to fix it:
Always check whether the product surface is suitable for UV DTF transfers.
For the best results, start with smooth surfaces like glass, stainless steel, or acrylic. If you're working with coated, painted, or plastic products, test a small transfer first.
Also, remember that UV DTF transfers aren't designed for fabrics. If you're decorating T-shirts, hoodies, or other textiles, traditional DTF printing is a better choice.
3. You're Not Applying Enough Pressure
UV DTF transfers use a pressure-sensitive adhesive, which means proper pressure is essential for a strong bond.
If you simply place the transfer on your product and peel away the film, the adhesive may not make full contact with the surface.
This often leads to lifting edges, small air bubbles, or parts of the design staying on the transfer film.
How to fix it:
Once you've positioned your transfer, press it firmly onto the surface.
Use your fingers or a soft squeegee to apply even pressure across the entire design. Start from the center and work outward to push out trapped air.
Pay extra attention to small letters, thin lines, and detailed edges.
Take your time here. A few extra seconds of firm, even pressure can make a big difference.
4. You're Peeling the Transfer Film Too Quickly
We get it. It's exciting to see your finished design!
But peeling the transfer film too quickly can cause problems, especially if the transfer hasn't bonded properly to the product.
You might notice that small details lift away with the film instead of staying on the surface.
How to fix it:
After applying the transfer, rub over the design again to make sure every part has good contact.
Then, slowly peel the transfer film back at a low angle, keeping it close to the surface.
If you notice part of the design lifting, stop peeling. Lay the film back down and apply more pressure before trying again.
For delicate designs, work slowly and carefully around small details.
5. The Temperature Is Too Low
Temperature can also affect how well UV DTF transfers stick.
When the working environment is too cold, pressure-sensitive adhesives may become less flexible and have difficulty forming a strong initial bond.
This is especially important if you're working in a cold workshop or storing your transfer films in an unheated area.
How to fix it:
Try applying your transfers in a clean, room-temperature environment.
If your films or products have been stored somewhere cold, allow them to reach room temperature before use.
Avoid applying transfers to surfaces that are extremely cold or covered with condensation.
And remember, UV DTF transfers don't require a heat press. Unlike traditional DTF transfers, they're designed to be applied using pressure rather than heat.
6. There's a Problem with Your UV DTF Film
Sometimes, the issue isn't your application technique. It's the film itself.
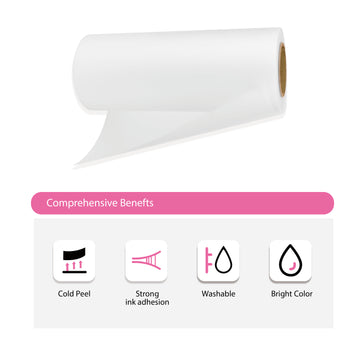
UV DTF printing typically uses a two-film system: A film and B film.
A film carries the printed design and its adhesive layer during printing. B film is laminated over the design and acts as the transfer carrier when you apply it to the finished product.
If the adhesive layer doesn't perform properly, or the films aren't compatible with your printing process, the finished transfer may have poor adhesion.
How to fix it:
Start by checking your UV DTF film.
Make sure you're using compatible A and B films and following the manufacturer's recommended printing and lamination settings.
Also, pay attention to storage conditions. Excessive heat, humidity, dust, and direct sunlight can affect film performance over time.
For more consistent results, choose reliable UV DTF consumables.
At Bbtransfer, we understand how important dependable materials are for everyday printing.
Using quality UV DTF films can help reduce application problems and keep your production process running smoothly.
7. Your Printing or Curing Settings Aren't Right
If you notice issues during printing, lamination, or transfer, it's worth checking the production process. But if the entire transfer won't stick to the product, start by checking the surface, adhesive, and application pressure.
UV DTF printing uses UV-curable ink, which is cured by UV light during printing.
If the curing settings aren't properly adjusted, the printed layers may not perform as expected. Too little curing can leave the ink insufficiently cured, while excessive curing may affect flexibility or layer performance, depending on the ink and film system.
Improper lamination can also create problems with the finished transfer.
How to fix it:
Check your printer's UV curing settings and make sure they match the recommendations for your ink and film.
You should also inspect your lamination process. Uneven pressure, incorrect settings, or trapped air can affect transfer quality.
If you're unsure where the problem starts, print a small test design and adjust one setting at a time.
This makes it much easier to identify the cause without wasting too much film or ink.
8. You're Not Giving the Adhesive Enough Time to Bond
Just because a UV DTF transfer sticks immediately doesn't mean it has reached its strongest bond.
Many pressure-sensitive adhesives develop stronger adhesion over time as they make closer contact with the surface.
If you wash, scratch, or heavily handle your decorated product immediately after application, the transfer may lift more easily.
How to fix it:
After applying your transfer, allow enough time for the adhesive bond to develop.
As a general precaution, consider waiting around 24 hours before washing or heavily handling the product, unless your film manufacturer recommends a different period.
During this time, keep the product clean and dry.
For drinkware, follow the transfer manufacturer's care instructions. Don't assume every UV DTF transfer is dishwasher-safe, even when applied to glass or stainless steel.
How to Make Your UV DTF Transfers Stick Better Every Time
Now that you know what can go wrong, let's put everything together.
Here are a few simple habits that can help you avoid adhesion problems:
- Choose the right surface. Smooth, hard, non-porous materials generally work best.
- Clean before applying. Remove dust, fingerprints, grease, and moisture.
- Use quality UV DTF films. Make sure your A and B films are compatible with your printer and ink.
- Apply firm, even pressure. Don't forget the edges and small details.
- Peel slowly. Give delicate parts of the design extra attention.
- Work at a suitable temperature. Avoid extremely cold surfaces and condensation.
- Allow time for bonding. Avoid washing or heavy handling immediately after application.
- If you're decorating a new type of product, always run a small test before starting a large batch.
It's a simple step that can save you time, materials, and frustration.
Final Thoughts
When your UV DTF transfers won't stick, it doesn't necessarily mean something is wrong with your printer.
In many cases, the problem comes down to surface preparation, application pressure, film quality, or environmental conditions.
The good news? Most of these issues can be prevented with a few small adjustments.
Whether you're customizing tumblers, creating branded merchandise, or running a UV DTF printing business, getting the application process right will help you produce more reliable, professional-looking results.
At Bbtransfer, we're here to help make your printing experience easier. With the right equipment, compatible consumables, and proper application techniques, you can spend less time troubleshooting and more time creating products your customers will love.
Happy printing!


